1 Surya Namaskar has the power of 12 asanas in it

Obesity has become a common problem for most people as their daily routine requires them to work behind a desk devoid of much physical labor. Moreover, the idea of hitting the gym or going for a run can be pretty demanding of your tight schedule.
But don’t worry, here’s an easy way out.
Yoga is the best way to shed extra pounds from your body and surya namaskar for weightloss is a popular choice among yoga fitness enthusiasts. The best thing about yoga is that you can do it in the comfort of your home.
Let’s uncover the benefits of surya namaskar, its detailed steps and some general guidelines to ease your weight loss journey.
What is Surya Namaskar?
In Sanskrit, Surya = Sun and Namaskar = Greeting or salute.
Surya namaskar or sun salutation is a physical and mental practice in yoga that involves performing a sequence of various asanas, gradually one after the other.
1 complete round of Surya Namaskar consists of 2 sets and each set consists of 12 asanas.
So, you perform 24 asanas in 1 round, once beginning with right and then with the left. This consumes a lot of calories that help you burn fat easily and keep you charged up for the day.
The human body and Surya Namaskar
As per Taittiriya Upanishad, our true self is not that we perceive but that it is hidden behind the 5 sheaths or the ‘panchamaya koshas’ which enclose it.
These 5 sheaths are :
- Annamaya Kosha – the body illusion
- Pranamaya Kosha – the breath illusion
- Manomaya Kosha – the mind illusion
- Vijnanamaya Kosha – the intellect/wisdom illusion
- Anandmaya Kosha – the bliss illusion
These 5 koshas or sheaths can be grouped into the gross or sthula (body), subtle or sukshma (breath, mind & intellect) and the causal or kaarana (bliss).
When Surya Namaskar is done properly, it affects all the 5 sheaths i.e. body, breath, mind, intellect and bliss of a person. The benefits that its performers get enhance their gross, subtle and causal bodies.
This is how Surya Namaskar is a healthy practice for your general health and spiritual awareness.
According to ancient Rig Veda, the sun is the soul of the universe. Without the sun the seasons can not change and no life form can thrive. Through Surya Namaskar one offers his gratitude to the sun.
Moreover, the sun is endowed with the qualities of being a divine healer, therefore, one can perform Surya Namaskar to cure oneself of various health problems.
How effective is Surya Namaskar for weight loss?
All other conventional forms of exercises like jogging, aerobics, weight lifting, etc. benefit different components of the body like muscles and joints but the daily practice of Surya Namaskar adds to the holistic development of your entire being, mind and body.
In a study conducted on obese people, it was concluded that regular practice of Surya Namaskar for one month is helpful in losing weight and that’s how…
Health benefits of Surya Namaskar –
- Increases metabolic rate
- Increases stamina and cardiovascular strength
- Improves the blood circulation
- Removes accumulated body toxins or ama
- Strengthens Agni, the digestive fire
- Improves immunity
- Replenishes body and soul with energy and brilliance
- Balances tridosha, the 3 vital energies
All these benefits are alluring enough to get you up and doing at least one round of Surya Namaskar for weight loss.
How to do Surya Namaskar for weight loss?
Step 1 : Pranamasana (Prayer pose)
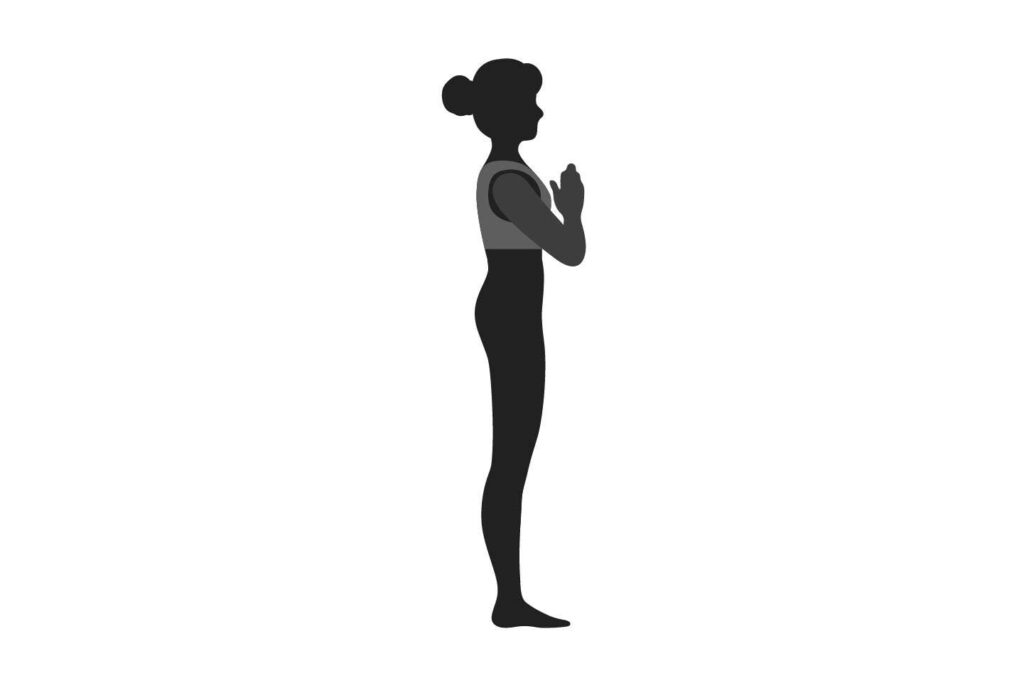
Stand up straight facing the sun. Fold your arms and join palms closer to your chest in a prayer pose.
Breathing – breathe in when you raise your hands and breathe out when you bring the palms closer to your chest.
Step 2 : Hasta Uttanasana
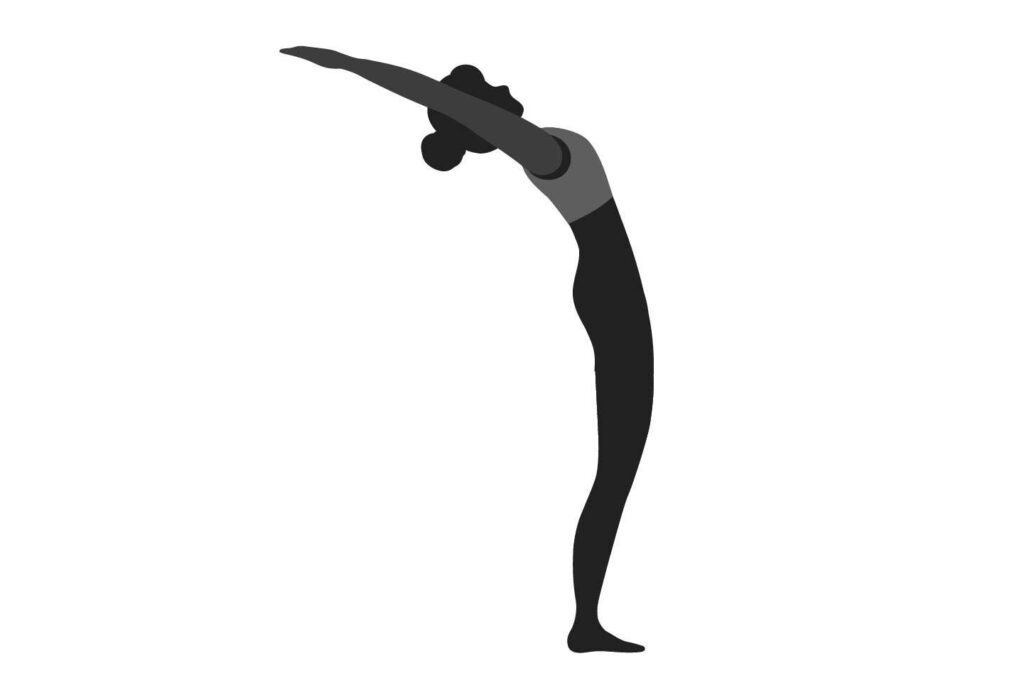
Raise your hands upwards. Stretch your arms upwards and gently bend them backwards. You should feel your spine being stretched.
Breathing – Inhale deeply during this process.
Step 3: Hasta Padasana
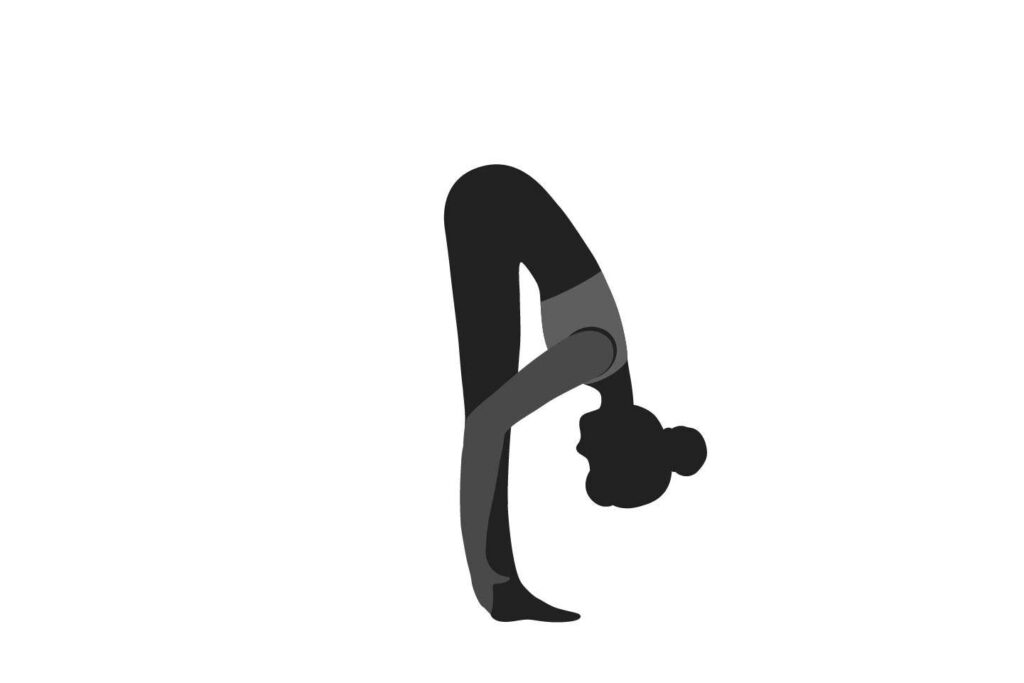
Bring your arms downward and bend your body from the pelvis. Your arms should touch the ground and your forehead should touch a little lower than the knees. Your spine should be as straight as possible.
Breathing – Exhale while doing this step.
Step 4 : Ashwa Sanchalanasana
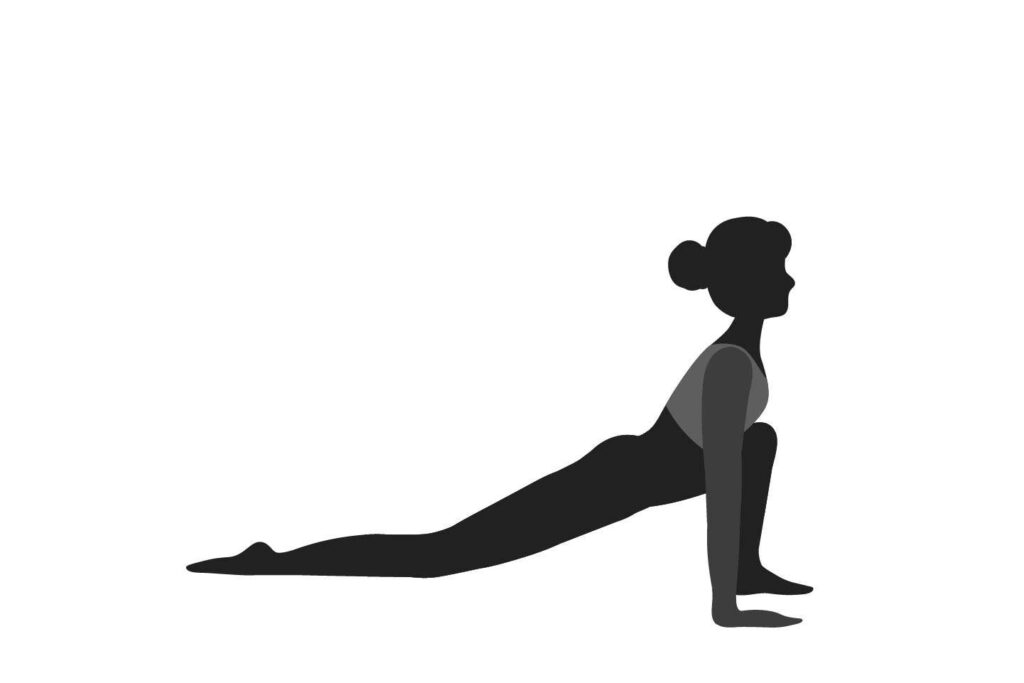
Keep your palms on the ground. Stretch the left leg backwards.
Keep your left foot stretched so that the sole of your left foot is upwards.
Raise your head up facing the front.
Breathing – Inhale deeply during these steps.
Step 5: Parvatasana
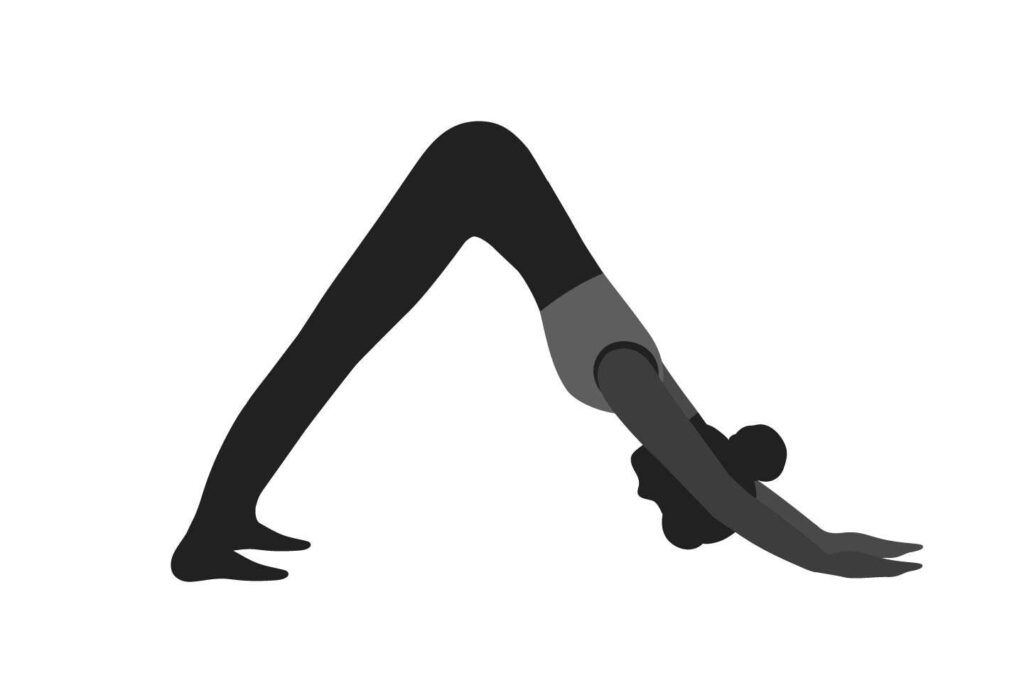
Now bring your right foot near the left foot. Keep your palm firmly on the ground. Raise your hip upwards, bending from the pelvic region. It should form an inverted ‘V’.
Breathing – You should exhale during these steps.
Step 6 : Ashtanga Namaskara
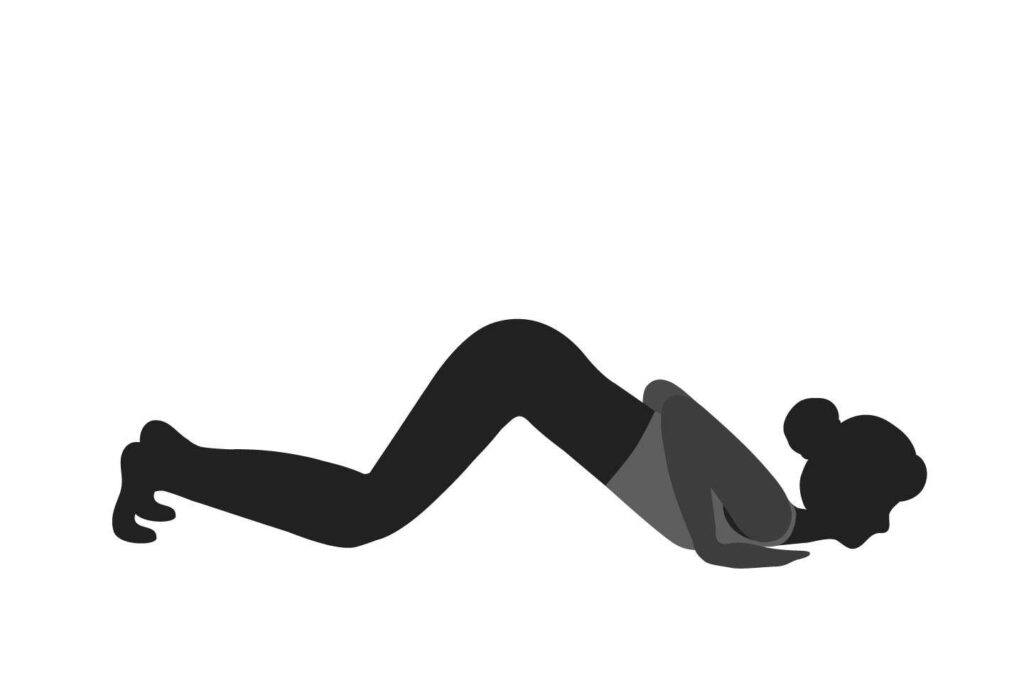
In this pose your 8 body organs (ashtanga) the two palms, two hands, two feet, chin and chest should be touching the ground as a mark of respect.
Keep your palm fixed on the ground. Stretch your body fully on the ground so that the 8 body organs touch the ground.
Then move your head to the left so that your right ear touches the ground and then move your head to the right so that the left ear touches the ground.
Breathing – Inhale deeply then exhale slowly.
Step 7: Bhujangasana
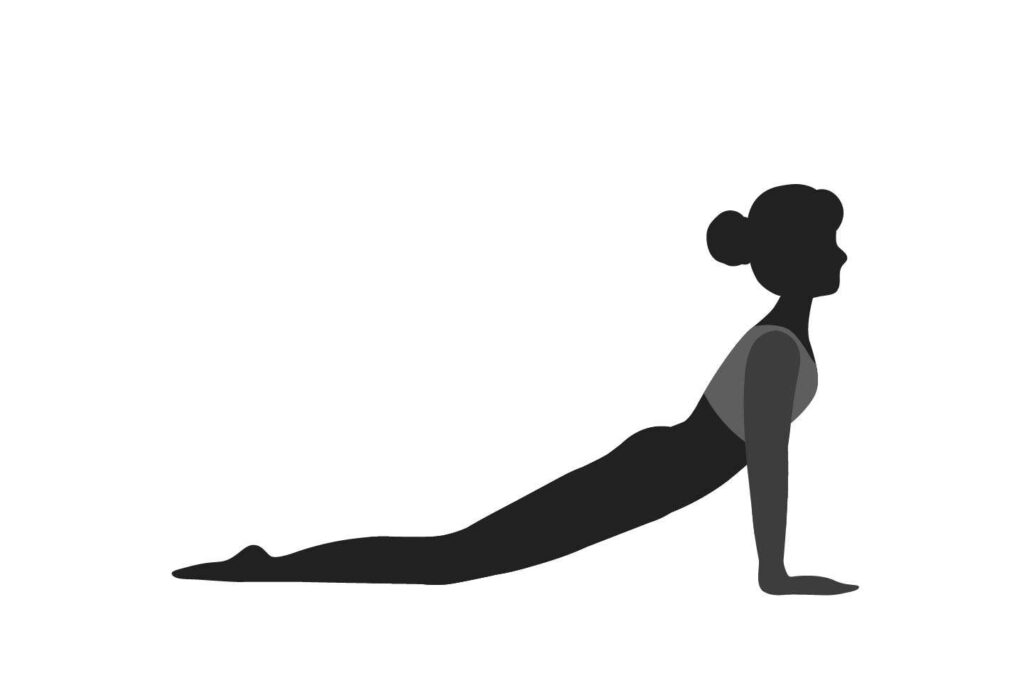
Raise your head upwards and rest your full legs and lower torso on the ground. Stretch your head upwards and backwards as much as possible but do not stress it.
Breathing – Exhale while stretching
Step 8: Parvatasana

Lower your head. Keep your palms and feet on the ground. Raise your hips upwards forming an inverted ‘V’.
Breathing – Exhale during this step.
Step 9: Ashwa Sanchalanasana

Bring your right leg forward and place it near your right palm. Raise your head up facing the front.
Breathing – Inhale in this step.
Step 10: Hasta Padasana

Bring your left leg closer to the left foot. Both feet should be between your palms and legs straight. Your forehead should touch your knees or a little lower depending on how much you can stretch your spine.
Breathing – exhale deeply
Step 11: Hasta Uttanasana

Lift your arms up as you come back to the standing position. Raise your arms above your head and slightly bend backwards while stretching your spine.
Breathing – Inhale during this process.
Step 12: Pranamasana

Bring your hands down, coming back to the starting position of the prayer pose.
Breathing – Exhale and Inhale deeply to calm yourself.
This sequence completes one set of Surya Namaskar.
You should do it again to complete one round by using your left foot in the place of your right foot this time.
General guidelines
To get all the positive benefits of Surya Namaskar follow these guidelines –
- Always use a mat for doing asanas. Do not do surya namaskar directly on the ground.
- Do not perform surya namaskar with jerky or fast movements. Do it with graceful and gentle movements.
- You may need a companion to support your movements so do ask for assistance.
- If you’re a beginner try to do some warm-up stretching before doing a complete set.
- Surya namaskar should be done in the morning to make your day positively energised and productive. However, you can also do it in the evening – face the west direction depending on the posting of the sun at that time.
- Do surya namaskar on an empty stomach.
- Try to breathe according to the directions below each step. It may be difficult initially but with practice, you’ll be able to breathe in and hold your breath for a longer time.
- Remember to express gratitude for everything that you have while being in the state of yoga.
- Feel a grounded connection with your surroundings and the universe with all of your 5 koshas.
Contraindications
Surya namaskar can be done by all age groups from kids to old people according to their capabilities.
But there are precautions that you must follow to avoid injury –
- If you have a hernia or back problem do not do surya namaskar.
- Pregnant women should avoid it from the 3rd month onwards and should completely avoid it if there are risks of miscarriages.
- If you feel uncomfortable during any of the steps, stop immediately and seek guidance from an expert.
- If you have undergone surgery do not do surya namaskar.
- For most of the part, your body weight is supported by your palms. So, avoid this sequence if you have arthritis or a wrist injury.
- If you have hypertension or heart problems consult your doctor before doing it.
Surya namaskar can help you get rid of all these problems if you are aware of your limit, right procedure and precautions. You can also perform surya namaskar for weightloss and get a fitter and healthier body.
Even if you can not do the entire sequence you can still perform individual asanas to get the holistic benefits of yoga.
To sum up
Surya namaskar is an all-rounder yoga sequence that strengthens you physically and mentally.
With the popularity of yoga, surya namaskar has become an effective choice for weight management.
Do seek an expert’s guidance before doing yoga poses because you may end up doing more harm than good by performing wrong asanas.
All the folks out there, surya namaskar for weightloss is one of the best decisions you’re going to make!
FAQs
How many times surya namaskar should be done in a day?
You should begin with one set of Surya Namaskar if you’re a beginner. If you feel right and at ease perform the second set with the other leg to complete one round.
Doing it slowly will take some time and 2 rounds are enough for the new performers. When regular, you should do between 4-12 rounds or so in a day. But do not overdo it. Only practice for as long and how much your body and mind can take it
Will Surya Namaskar reduce belly fat?
Yes. Yoga burns a lot of calories that will help you get in shape. Surya namaskar contains 12 asanas in one set and 24 asanas in one round of two sets. This allows you to burn a lot of calories. The yoga poses are also designed in a way that they help in reducing abdominal fat. So, if you want a flat tummy, Surya namaskar is a wonderful exercise to try.
Should we do surya namaskar fast or slow?
Surya Namaskar should be done at a moderate pace. You should be able to retain the pose for a few seconds and slowly change to the next pose. Always be slow and steady with Surya Namaskar.

